Hello Lovelies, Taz here again, and I have had commentary privately asking where I get my stuff for my Products I use on here.. that is a difficult answer because it really depends on the product. I will list some of my main suppliers here and what I get from them, I will state that I write reviews for products on Amazon, and thus I am offered a discount on several of my items like Essential oils.
Herbs - I ALWAYS Get my Herbs from Monterey Bay Spice Company They have the best prices for bulk herbs and spices, and Honestly it is something I think you should ALWAYS buy in bulk.. invest in a vacuum sealer if you are worried about space.
Essential oils - Before I started getting my Essential oils at a discount, I looked around for the best prices on them because well honestly they are freaking expensive.. the cheapest place I have found for good quality Essential oils is Majestic Mountain Sage,
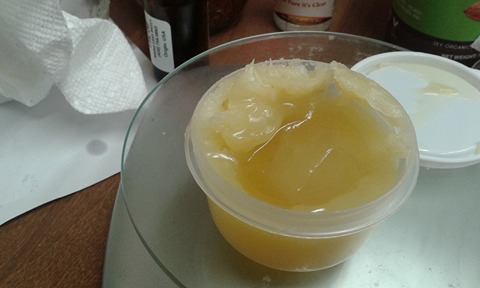
Beeswax - Honestly if you live on your own land I would say beekeep. free beeswax and honey.. but if you don't want to or can't.. Go to Amazon.. that is where I get mine, and usually I do pay full price for my beeswax.
Oils - and now this is where it gets complicated.. because it depends on the oil.. Some oils I get from Sams in bulk, or our local Kroger.. because its cheaper than buying online, same with Big things of coconut oil, Several of my less common oils like Evening Primrose oil, and pumpkin seed oil etc, I get from Amazon because Honestly Amazon is my main go to place.
Butters - Again Amazon is my go to place.
Containers - depends on the containers.. some I have gotten for discount, some I have gotten on clearance at various sites, and some I go to the Dollar tree for, because you can't beat 1 dollar for 10 containers, some I get from my local store.. like glass jars.
I sort of collect and hoard supplies, whenever I can find a great price be it because it is on Clearance or I found an EXCELLENT site for prices, or because I am able to get something at a discount because I give an honest review for that item.. Just keep your eyes peeled.. You would be surprised at where you can find certain stuff. I get Lye from my local Ace Hardware store, Pet stores have Pine Tar which is great for pine tar soap, which is amazing for skin conditions.
My Biggest advice I can give is to SHOP AROUND, go to thrift stores, and Craigslist, and your local buy and trade, even yard sales, are great places to find stuff. There are some excellent sellers on etsy for soaping supplies, and if all else fails.. check Amazon periodically you will find some really really great sales, and I would suggest if you find a sale.. invest.. because it is in investment.. it took a while for my husband to figure out that it really was an investment, I make lotion bars for his dry skin issues, and Lip balm he swears by.. I make Bath teas, and bath bombs.. you do it right you can pamper the crap out of yourself without spending too much money, and the best part is YOU KNOW WHAT YOU PUT IN TO YOUR ITEMS.. and to me.. That is the best thing ever. So there you go Lovelies, if you have any questions, please feel free to ask!
Translate
Showing posts with label DIY. Show all posts
Sunday, June 5, 2016
Infusing Oils with herbs (Calendula in this one)
Hello lovelies, Taz here. I have been making lots of ointments, lotion bars, lip balms and other stuff since for me this is the time of year to do that.. Well I am about to use the very last of my Calendula infused olive oil, so I thought I would make a quick post to show you how easy it is to make your own infused oils, this way you get all the benefits of the herbs in your products.
WHAT YOU WILL NEED.. this is the shortest easiest list ever.. seriously
Oil of your choice - I used Olive oil this time
Herb of your choice - I used Calendula this time.
Jar or container to store it in that is airtight. I just used one of the jars that I used last time. and something to get the air bubbles out, I use a bamboo skewer.
WHAT YOU DO.. again.. this is SO EASY, its really hard to mess this up..
Put herbs in to Jar..
Shove them down
Keep filling till you are a bit over half way full of herbs once pressed down
Fill with your oil right to the bottom ridge of the lid area..
Now use your skewer and poke in there, and stir it gently to get all the air bubbles out.
Put your lid on, and shake it up, and then store in a nice cool dark area, shaking every day or two, and let steep for about 4-6 weeks..
Time consuming yes, but worth it.
Every time you are low, just make some more.. once you strain it out.. you will be left with lovely infused oil like this
There you go.. Nice beautiful infused oil to use in your next ointment, soap, lotion, etc..
Thank you for looking and if you make it I would love to see what you make! Soon I will post Lip balm, Lotion bars, and more! a new soap recipe will be up soon as well.
Thursday, June 2, 2016
Homestead First Aid : DIY Calendula Ointment (All natural and petroleum free)
Hello Lovelies! I'm back! Since I am on a tear getting stuff ready to go on a vacation, where we will be camping, I am making ointments for my travel kit. Earlier tonight as you saw I made Antiseptic Ointment.. This post is about Calendula Ointment which is great for Skin irritations, Rashes, and as a basic skin lotion type ointment.. For this you WILL need to have Calendula infused oil.. to do that.. you will need a few weeks.. I Use a jar, fill it with Calendula, Then with Olive oil..Put in a nice dark place and flip it a few times a day for 2 weeks minimum.. mine has been infusing for about 2 months.. yes I am a procrastinator. A Pint Jar gave me 10 ounces..
I used 2 in the Antiseptic ointment the rest went into this ointment..
well lovelies LET'S GET STARTED!!!
EQUIPMENT:
A Container to mix and melt the oils in that is heat proof/ microwave proof.. I used a Mason jar.
Containers to pour your ointment into, I used some that I got 10 for a Dollar from the Dollar tree..
Paper Towels since this MIGHT get messy.. it always does when I do it.
INGREDIENTS :
8 ounces Calendula infused Olive oil
2 ounces Beeswax I use Pellets for easy measuring, but you can grate your own or whatever.
40-50 drops of Lavender Essential oil
and Optional 1/4 Tsp of Vitamin E
WHAT TO DO :
Measure out 8 ounces of oil into a container of your choice..
Add 2 ounces of Beeswax grated or pellets to the oil
Bring oil over to microwave or other heating station.. the next few steps will show how *I* did it in the Microwave
Heat for 30 seconds.. and stir.
melting a bit.. but still not enough.. do not forget to stir well in between.. okay one more time.. Back in the microwave.. 30 seconds
THIS is what you want.. see how all of the wax has moved to the top? that's what you want.. now carefully transfer it back to your work station.. and start stirring..
Stir
Keep stirring.. there are still pieces of unmelted wax..
Ahh there you go! All melted Now Keep stirring till it cools down a little bit because you don't want it too hot or your essential oil will evaporate and then whats the point?
Okay Add your 40-50 drops of Essential oil and Stir some more..
don't worry total it takes about 5 minutes from Start to finish after you strain your oil.
Now .. pour your mixture in to your containers..
you will notice its a bit darker than the Antiseptic ointment.. because of the Calendula in the oil at this stage..
Alright! All packaged! dont forget to mark your container so you dont get confused.. cause its not that different in color..
And don't worry neither are greasy!
that is all for now my lovelies! I hope you are all fantastic and I would LOVE to hear what you think, and if you make it let me see!
Homestead First aid : DIY Antiseptic ointment (Petroleum free and natural)
Hello Lovelies, Taz here! I know its been awhile since I have posted, lots has been going on, our entire household has had a horrible stomach virus and its been kicking our butts, but I have still been working on getting ready to go on a vacation! YAY. I might make a post about what I am packing for emergency supplies on that trip.. and we are going camping so.. some of it is for that.. But now for what this post is about.. ANTISEPTIC OINTMENT!
I will have a Homestead First Aid DIY section, and I will be posting alternatives to store brand stuff that is usually Petroleum based.. I HATE PETROLEUM JELLY! IT IS HORRIBLE HORRIBLE HORRIBLE For your skin! It is Horrible for YOU. Would you put gasoline on your lips? no? then don't put petroleum Jelly on your lips.. or anywhere else.. I will post a Petroleum free salve type skin thing soon.. but this one is for well you saw.
EQUIPMENT YOU WILL NEED :
A Container to put your oils and wax into, I used a Mason jar, a measuring cup will work, anything that will hold the oils and is microwave safe, or oven safe..
A Scale that you can tare or Null out. . I have one I got at walmart years ago for 10 dollars, I think everyone should keep a scale on hand for MANY reasons.
A Microwave, or stove top I used the Microwave for convenience.
Containers to put your ointment in! I used little ones I got 10 for a dollar because saving money is good.
Two Ounces Calendula Infused Olive oil
1/4 Tsp Vitamin E (DON'T USE CAPSULES.. that's not actually vitamin E usually. )
1/2 Tsp Tea Tree essential oil
20 Drops Lavender essential oil
10 Drops Lemon Essential oil
Alright.. do you have everything Gathered? good. The next parts are SOOOO SOO EASY
Add your grated or pellet beeswax to your container.
Add your Sweet almond oil, your Calendula infused olive oil, and your Olive oil..
Stir..
Put in microwave.. Microwave in 30 second burst.. and stir very well in between (or alternatively place in a container in a double boiler.. or create a double boiler.. but really microwave is much easier) For me it took 3 30 second burst.. wax melted quite well into the oil..
bring it over to where all your stuff is..
wipe off the edge of your container..
stir and stir.. and stir some more till its still hot to touch but not burn your skin off hot.
Add your essential oils..
Stir some more.. (lots of stirring isn't there)
Open your containers.. and carefully pour to your desired level of fullness.
Let cool.. and VOALA you have Antiseptic ointment.
It will set up to a nice thick ointment that looks like this
Happy creating.. I created 2 years worth of ointment in about 10 minutes total.. that includes gathering equipment, mixing, pouring, and cleaning
Thank you for joining me.. I will be posting a post about calendula ointment next!
I will have a Homestead First Aid DIY section, and I will be posting alternatives to store brand stuff that is usually Petroleum based.. I HATE PETROLEUM JELLY! IT IS HORRIBLE HORRIBLE HORRIBLE For your skin! It is Horrible for YOU. Would you put gasoline on your lips? no? then don't put petroleum Jelly on your lips.. or anywhere else.. I will post a Petroleum free salve type skin thing soon.. but this one is for well you saw.
EQUIPMENT YOU WILL NEED :
A Container to put your oils and wax into, I used a Mason jar, a measuring cup will work, anything that will hold the oils and is microwave safe, or oven safe..
A Scale that you can tare or Null out. . I have one I got at walmart years ago for 10 dollars, I think everyone should keep a scale on hand for MANY reasons.
A Microwave, or stove top I used the Microwave for convenience.
Containers to put your ointment in! I used little ones I got 10 for a dollar because saving money is good.
Paper Towels or a rag because this gets messy
and something to stir with.
Now on to the next thing
INGREDIENTS YOU WILL NEED
1 1/2 ounce Beeswax (I use Pellets typically but you can grate your own)
2 Ounces Sweet Almond Oil
4 Ounces Olive oil
1/4 Tsp Vitamin E (DON'T USE CAPSULES.. that's not actually vitamin E usually. )
1/2 Tsp Tea Tree essential oil
20 Drops Lavender essential oil
10 Drops Lemon Essential oil
Alright.. do you have everything Gathered? good. The next parts are SOOOO SOO EASY
Add your grated or pellet beeswax to your container.
Add your Sweet almond oil, your Calendula infused olive oil, and your Olive oil..
Stir..
Put in microwave.. Microwave in 30 second burst.. and stir very well in between (or alternatively place in a container in a double boiler.. or create a double boiler.. but really microwave is much easier) For me it took 3 30 second burst.. wax melted quite well into the oil..
bring it over to where all your stuff is..
wipe off the edge of your container..
stir and stir.. and stir some more till its still hot to touch but not burn your skin off hot.
Add your essential oils..
Stir some more.. (lots of stirring isn't there)
Open your containers.. and carefully pour to your desired level of fullness.
Let cool.. and VOALA you have Antiseptic ointment.
It will set up to a nice thick ointment that looks like this
Happy creating.. I created 2 years worth of ointment in about 10 minutes total.. that includes gathering equipment, mixing, pouring, and cleaning
Thank you for joining me.. I will be posting a post about calendula ointment next!
Subscribe to:
Posts (Atom)